langkah petama untuk menconfigurasi router mikrotik agar bisa terkoneksi internet anda harus membutuhkan
1. IP public contoh 202.158.10.2/30
2. IP LAn contoh 192.168.1.1/24 (range ip 192.168.1.2-20 yang mau di sett)
3. DNS contoh 202.158.3.7 ( ini dns isp)
4. IP gateway public misal 202.158.10.1
5. Setting Natnya
6. limit bandwidt 512 kbps local dan 256 kbps international
===============================================================================
mari kita mulai untuk terapkan langkah 1- 5 itu
sebelumnya anda harus download program sing arane winbox buat config ke mikrotik download disini ya ..
http://mikrotik.co.id/download.php
trus langkah buka winbox lalu scan mac address akan tampil mac address pilih mac address mikrotik anda lalu klik connect pastiin kabel utpnya dari rouer mikrotik ke pc anda terkoneksi baik gambarnya serperti ini :
ini adalah settingan dasar mikrotik sampe anda bisa konek ke internet.. untuk menyetting router mikrotik ini .. hehe
Pertama buat/set ip publik dulu ke ether 1 atau juga di sebut IP WAN dengan cara copy ini di new terminal yang berada di dalam Winbox
[sourcecode language="css"]
ip address add address=202.158.10.2/30 netmask=255.255.255.252 interface=ether1
[/sourcecode]
Lalu tinggal Set IP gateway LAN copy ini
[sourcecode language="css"]
ip address add address=192.168.1.1/24 netmask=255.255.255.0 interface=ether2
[/sourcecode]
lalu copy juga ini
[sourcecode language="css"]
/ system clock
set time-zone-name=Asia/Jakarta
/ system ntp client set primary-ntp=207.46.197.32 secondary-ntp=192.43.244.18 \ mode=unicast enabled=yes
/ ip dns set allow-remote-requests=yes primary-dns=202.158.3.7 secondary-dns=202.158.3.6
/ ip route add gateway=202.158.10.1
/ ip firewall mangle
add chain=prerouting in-interface=ether2 dst-address-list=nice action=mark-connection new-connection-mark=conn-iix passthrough=yes
add chain=prerouting in-interface=ether2 dst-address-list=!nice action=mark-connection new-connection-mark=conn-intl passthrough=yes
add chain=prerouting connection-mark=conn-iix action=mark-packet new-packet-mark=indonesia passthrough=no
add chain=output connection-mark=conn-iix action=mark-packet new-packet-mark=indonesia passthrough=no
add chain=prerouting connection-mark=conn-intl action=mark-packet new-packet-mark=overseas passthrough=no
add chain=output connection-mark=conn-intl action=mark-packet new-packet-mark=overseas passthrough=no
/ queue simple
add name="iix-2" target-addresses=192.168.1.2/32 dst-address=0.0.0.0/0 interface=all parent=none packet-marks=indonesia \
direction=both priority=8 queue=default/default limit-at=0/0 max-limit=512000/512000 total-queue=default-small
add name="int-2" target-addresses=192.168.1.2/32 dst-address=0.0.0.0/0 interface=all parent=none packet-marks=overseas \
direction=both priority=8 queue=default/default limit-at=0/0 max-limit=256000/256000 total-queue=default-small
add name="iix-3" target-addresses=192.168.1.3/32 dst-address=0.0.0.0/0 interface=all parent=none packet-marks=indonesia \
direction=both priority=8 queue=default/default limit-at=0/0 max-limit=512000/512000 total-queue=default-small
add name="int-3" target-addresses=192.168.1.3/32 dst-address=0.0.0.0/0 interface=all parent=none packet-marks=overseas \
direction=both priority=8 queue=default/default limit-at=0/0 max-limit=256000/256000 total-queue=default-small
add name="iix-4" target-addresses=192.168.1.4/32 dst-address=0.0.0.0/0 interface=all parent=none packet-marks=indonesia \
direction=both priority=8 queue=default/default limit-at=0/0 max-limit=512000/512000 total-queue=default-small
add name="int-4" target-addresses=192.168.1.4/32 dst-address=0.0.0.0/0 interface=all parent=none packet-marks=overseas \
direction=both priority=8 queue=default/default limit-at=0/0 max-limit=256000/256000 total-queue=default-small
add name="iix-5" target-addresses=192.168.1.5/32 dst-address=0.0.0.0/0 interface=all parent=none packet-marks=indonesia \
direction=both priority=8 queue=default/default limit-at=0/0 max-limit=512000/512000 total-queue=default-small
add name="int-5" target-addresses=192.168.1.5/32 dst-address=0.0.0.0/0 interface=all parent=none packet-marks=overseas \
direction=both priority=8 queue=default/default limit-at=0/0 max-limit=256000/256000 total-queue=default-small
add name="iix-6" target-addresses=192.168.1.6/32 dst-address=0.0.0.0/0 interface=all parent=none packet-marks=indonesia \
direction=both priority=8 queue=default/default limit-at=0/0 max-limit=512000/512000 total-queue=default-small
add name="int-6" target-addresses=192.168.1.6/32 dst-address=0.0.0.0/0 interface=all parent=none packet-marks=overseas \
direction=both priority=8 queue=default/default limit-at=0/0 max-limit=256000/256000 total-queue=default-small
add name="iix-7" target-addresses=192.168.1.7/32 dst-address=0.0.0.0/0 interface=all parent=none packet-marks=indonesia \
direction=both priority=8 queue=default/default limit-at=0/0 max-limit=512000/512000 total-queue=default-small
add name="int-7" target-addresses=192.168.1.7/32 dst-address=0.0.0.0/0 interface=all parent=none packet-marks=overseas \
direction=both priority=8 queue=default/default limit-at=0/0 max-limit=256000/256000 total-queue=default-small
add name="iix-8" target-addresses=192.168.1.8/32 dst-address=0.0.0.0/0 interface=all parent=none packet-marks=indonesia \
direction=both priority=8 queue=default/default limit-at=0/0 max-limit=512000/512000 total-queue=default-small
add name="int-8" target-addresses=192.168.1.8/32 dst-address=0.0.0.0/0 interface=all parent=none packet-marks=overseas \
direction=both priority=8 queue=default/default limit-at=0/0 max-limit=256000/256000 total-queue=default-small
add name="iix-9" target-addresses=192.168.1.9/32 dst-address=0.0.0.0/0 interface=all parent=none packet-marks=indonesia \
direction=both priority=8 queue=default/default limit-at=0/0 max-limit=512000/512000 total-queue=default-small
add name="int-9" target-addresses=192.168.1.9/32 dst-address=0.0.0.0/0 interface=all parent=none packet-marks=overseas \
direction=both priority=8 queue=default/default limit-at=0/0 max-limit=256000/256000 total-queue=default-small
add name="iix-10" target-addresses=192.168.1.10/32 dst-address=0.0.0.0/0 interface=all parent=none packet-marks=indonesia \
direction=both priority=8 queue=default/default limit-at=0/0 max-limit=512000/512000 total-queue=default-small
add name="int-10" target-addresses=192.168.1.10/32 dst-address=0.0.0.0/0 interface=all parent=none packet-marks=overseas \
direction=both priority=8 queue=default/default limit-at=0/0 max-limit=256000/256000 total-queue=default-small
add name="iix-11" target-addresses=192.168.1.11/32 dst-address=0.0.0.0/0 interface=all parent=none packet-marks=indonesia \
direction=both priority=8 queue=default/default limit-at=0/0 max-limit=512000/512000 total-queue=default-small
add name="int-11" target-addresses=192.168.1.11/32 dst-address=0.0.0.0/0 interface=all parent=none packet-marks=overseas \
direction=both priority=8 queue=default/default limit-at=0/0 max-limit=256000/256000 total-queue=default-small
add name="iix-12" target-addresses=192.168.1.12/32 dst-address=0.0.0.0/0 interface=all parent=none packet-marks=indonesia \
direction=both priority=8 queue=default/default limit-at=0/0 max-limit=512000/512000 total-queue=default-small
add name="int-12" target-addresses=192.168.1.12/32 dst-address=0.0.0.0/0 interface=all parent=none packet-marks=overseas \
direction=both priority=8 queue=default/default limit-at=0/0 max-limit=256000/256000 total-queue=default-small
add name="iix-13" target-addresses=192.168.1.13/32 dst-address=0.0.0.0/0 interface=all parent=none packet-marks=indonesia \
direction=both priority=8 queue=default/default limit-at=0/0 max-limit=512000/512000 total-queue=default-small
add name="int-13" target-addresses=192.168.1.13/32 dst-address=0.0.0.0/0 interface=all parent=none packet-marks=overseas \
direction=both priority=8 queue=default/default limit-at=0/0 max-limit=256000/256000 total-queue=default-small
add name="iix-14" target-addresses=192.168.1.14/32 dst-address=0.0.0.0/0 interface=all parent=none packet-marks=indonesia \
direction=both priority=8 queue=default/default limit-at=0/0 max-limit=512000/512000 total-queue=default-small
add name="int-14" target-addresses=192.168.1.14/32 dst-address=0.0.0.0/0 interface=all parent=none packet-marks=overseas \
direction=both priority=8 queue=default/default limit-at=0/0 max-limit=256000/256000 total-queue=default-small
add name="iix-15" target-addresses=192.168.1.15/32 dst-address=0.0.0.0/0 interface=all parent=none packet-marks=indonesia \
direction=both priority=8 queue=default/default limit-at=0/0 max-limit=512000/512000 total-queue=default-small
add name="int-15" target-addresses=192.168.1.15/32 dst-address=0.0.0.0/0 interface=all parent=none packet-marks=overseas \
direction=both priority=8 queue=default/default limit-at=0/0 max-limit=256000/256000 total-queue=default-small
add name="iix-16" target-addresses=192.168.1.16/32 dst-address=0.0.0.0/0 interface=all parent=none packet-marks=indonesia \
direction=both priority=8 queue=default/default limit-at=0/0 max-limit=512000/512000 total-queue=default-small
add name="int-16" target-addresses=192.168.1.16/32 dst-address=0.0.0.0/0 interface=all parent=none packet-marks=overseas \
direction=both priority=8 queue=default/default limit-at=0/0 max-limit=256000/256000 total-queue=default-small
add name="iix-17" target-addresses=192.168.1.17/32 dst-address=0.0.0.0/0 interface=all parent=none packet-marks=indonesia \
direction=both priority=8 queue=default/default limit-at=0/0 max-limit=512000/512000 total-queue=default-small
add name="int-17" target-addresses=192.168.1.17/32 dst-address=0.0.0.0/0 interface=all parent=none packet-marks=overseas \
direction=both priority=8 queue=default/default limit-at=0/0 max-limit=256000/256000 total-queue=default-small
add name="iix-18" target-addresses=192.168.1.18/32 dst-address=0.0.0.0/0 interface=all parent=none packet-marks=indonesia \
direction=both priority=8 queue=default/default limit-at=0/0 max-limit=512000/512000 total-queue=default-small
add name="int-18" target-addresses=192.168.1.18/32 dst-address=0.0.0.0/0 interface=all parent=none packet-marks=overseas \
direction=both priority=8 queue=default/default limit-at=0/0 max-limit=256000/256000 total-queue=default-small
add name="iix-19" target-addresses=192.168.1.19/32 dst-address=0.0.0.0/0 interface=all parent=none packet-marks=indonesia \
direction=both priority=8 queue=default/default limit-at=0/0 max-limit=512000/512000 total-queue=default-small
add name="int-19" target-addresses=192.168.1.19/32 dst-address=0.0.0.0/0 interface=all parent=none packet-marks=overseas \
direction=both priority=8 queue=default/default limit-at=0/0 max-limit=256000/256000 total-queue=default-small
add name="iix-20" target-addresses=192.168.1.20/32 dst-address=0.0.0.0/0 interface=all parent=none packet-marks=indonesia \
direction=both priority=8 queue=default/default limit-at=0/0 max-limit=512000/512000 total-queue=default-small
add name="int-20" target-addresses=192.168.1.20/32 dst-address=0.0.0.0/0 interface=all parent=none packet-marks=overseas \
direction=both priority=8 queue=default/default limit-at=0/0 max-limit=256000/256000 total-queue=default-small
/ ip firewall filter
add chain=forward in-interface=ether2 src-address=192.168.1.2 action=accept
add chain=forward in-interface=ether2 src-address=192.168.1.3 action=accept
add chain=forward in-interface=ether2 src-address=192.168.1.4 action=accept
add chain=forward in-interface=ether2 src-address=192.168.1.5 action=accept
add chain=forward in-interface=ether2 src-address=192.168.1.6 action=accept
add chain=forward in-interface=ether2 src-address=192.168.1.7 action=accept
add chain=forward in-interface=ether2 src-address=192.168.1.8 action=accept
add chain=forward in-interface=ether2 src-address=192.168.1.9 action=accept
add chain=forward in-interface=ether2 src-address=192.168.1.10 action=accept
add chain=forward in-interface=ether2 src-address=192.168.1.11 action=accept
add chain=forward in-interface=ether2 src-address=192.168.1.12 action=accept
add chain=forward in-interface=ether2 src-address=192.168.1.13 action=accept
add chain=forward in-interface=ether2 src-address=192.168.1.14 action=accept
add chain=forward in-interface=ether2 src-address=192.168.1.15 action=accept
add chain=forward in-interface=ether2 src-address=192.168.1.16 action=accept
add chain=forward in-interface=ether2 src-address=192.168.1.17 action=accept
add chain=forward in-interface=ether2 src-address=192.168.1.18 action=accept
add chain=forward in-interface=ether2 src-address=192.168.1.19 action=accept
add chain=forward in-interface=ether2 src-address=192.168.1.20 action=accept
add chain=forward in-interface=ether2 action=drop
/ ip firewall nat
add chain=srcnat src-address=192.168.1.0/24 action=src-nat \
to-addresses=202.158.10.2 to-ports=0-65535 comment="" disabled=no
add chain=dstnat dst-address=202.158.10.2 protocol=tcp dst-port=6110 \
action=dst-nat to-addresses=192.168.1.2 to-ports=6110 comment="" \
disabled=no
add chain=dstnat dst-address=202.158.10.2 protocol=tcp dst-port=6111 \
action=dst-nat to-addresses=192.168.1.3 to-ports=6111 comment="" \
disabled=no
add chain=dstnat dst-address=202.158.10.2 protocol=tcp dst-port=6112 \
action=dst-nat to-addresses=192.168.1.4 to-ports=6112 comment="" \
disabled=no
add chain=dstnat dst-address=202.158.10.2 protocol=tcp dst-port=6113 \
action=dst-nat to-addresses=192.168.1.5 to-ports=6113 comment="" \
disabled=no
add chain=dstnat dst-address=202.158.10.2 protocol=tcp dst-port=6114 \
action=dst-nat to-addresses=192.168.1.6 to-ports=6114 comment="" \
disabled=no
add chain=dstnat dst-address=202.158.10.2 protocol=tcp dst-port=6115 \
action=dst-nat to-addresses=192.168.1.7 to-ports=6115 comment="" \
disabled=no
add chain=dstnat dst-address=202.158.10.2 protocol=tcp dst-port=6116 \
action=dst-nat to-addresses=192.168.1.8 to-ports=6116 comment="" \
disabled=no
add chain=dstnat dst-address=202.158.10.2 protocol=tcp dst-port=6117 \
action=dst-nat to-addresses=192.168.1.9 to-ports=6117 comment="" \
disabled=no
add chain=dstnat dst-address=202.158.10.2 protocol=tcp dst-port=6118 \
action=dst-nat to-addresses=192.168.1.10 to-ports=6118 comment="" \
disabled=no
add chain=dstnat dst-address=202.158.10.2 protocol=tcp dst-port=6119 \
action=dst-nat to-addresses=192.168.1.11 to-ports=6119 comment="" \
disabled=no
add chain=dstnat dst-address=202.158.10.2 protocol=tcp dst-port=6120 \
action=dst-nat to-addresses=192.168.1.12 to-ports=6120 comment="" \
disabled=no
add chain=dstnat dst-address=202.158.10.2 protocol=tcp dst-port=6121 \
action=dst-nat to-addresses=192.168.1.13 to-ports=6121 comment="" \
disabled=no
add chain=dstnat dst-address=202.158.10.2 protocol=tcp dst-port=6122 \
action=dst-nat to-addresses=192.168.1.14 to-ports=6122 comment="" \
disabled=no
add chain=dstnat dst-address=202.158.10.2 protocol=tcp dst-port=6123 \
action=dst-nat to-addresses=192.168.1.15 to-ports=6123 comment="" \
disabled=no
add chain=dstnat dst-address=202.158.10.2 protocol=tcp dst-port=6124 \
action=dst-nat to-addresses=192.168.1.16 to-ports=6124 comment="" \
disabled=no
add chain=dstnat dst-address=202.158.10.2 protocol=tcp dst-port=6125 \
action=dst-nat to-addresses=192.168.1.17 to-ports=6125 comment="" \
disabled=no
add chain=dstnat dst-address=202.158.10.2 protocol=tcp dst-port=6126 \
action=dst-nat to-addresses=192.168.1.18 to-ports=6126 comment="" \
disabled=no
add chain=dstnat dst-address=202.158.10.2 protocol=tcp dst-port=6127 \
action=dst-nat to-addresses=192.168.1.19 to-ports=6127 comment="" \
disabled=no
add chain=dstnat dst-address=202.158.10.2 protocol=tcp dst-port=6128 \
action=dst-nat to-addresses=192.168.1.20 to-ports=6128 comment="" \
disabled=no
[/sourcecode]
agar port 3-5 berfungsi sebagai lan buat master port diarahkan ke ether2 copy ini
[sourcecode language="css"]
/ interface ethernet set ether3 master-port=ether2
/ interface ethernet set ether4 master-port=ether2
/ interface ethernet set ether5 master-port=ether2
[/sourcecode]
Note : copy semua yang ada di atas lalu masukin di notepad lalu find and replace dengan cara Ctrl+R paling cuma ganti IP public, IP gateway publik dan IP Dns server
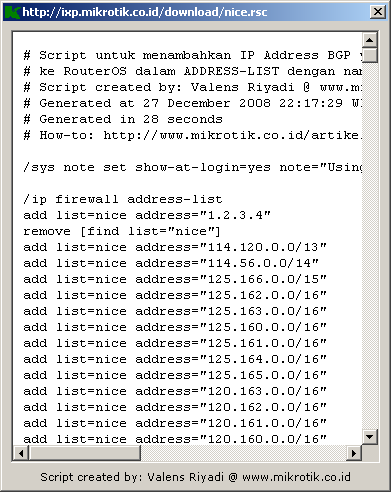
http://ixp.mikrotik.co.id/download/nice.rsc Ctl + A aja biar ke blok semua lalu copy lalu paste in di terminal mikrotik lalu enter gampangkan oh yaa buat yang masih bingung terminal bukan terminal bis ya heheh penulis coba mengajarkan sampe tingkat tk sd juga ngerti heheh ini loh terminal 
WAH WAH DI JAMIN ANDA PASTI BISSSAAAAA.....JADI TUKANG IT SEMPROTT
Mudahnya configurasi Router Mikrotik hanya dengan 5 menit


Installing Centos 5.5 + asterisk and FreePBX.
http://www.youtube.com/watch?v=j1i-eii3mac
cd /
cd opt/
wget http://www.phillip-cooper.co.uk/centos/asterisk-install.sh
chmod 777 asterisk-install.sh
./asterisk-install.sh
yum -y install freepbx


Restore a configuration file from a TFTP server with Packet Tracer -Cisco CCNA
http://www.youtube.com/watch?v=5TBUALTxrtI&feature=relmfu
cara back up file ke tftp server dan restore dari tftp server ke router
UNTUK MEMBACK UP KE TFTP SERVER
==============================
copy startup-config tftp
192.18.1.254 (ini IP komputer yang ada tftp servernya)
dans-config (nama file)
sh version (untuk melihat versi ios)
==================
UNTUK NGOPI IOSNYA
===================
copy flash tftp
pt1000-mz.122--28.bin
192.168.1.254
dansIOS
COBA DIHAPUS CONFIGURE YANG LAMA DG
erase startup-config
reload
COPY FILE DARI FTTP SERVER KE ROUTER
copy tftp running-config
192.168.1.254
dans-config
enter aja
jangan lupa di routernya harus di kasih IP dulu yang satu network dengan tftp servernya contoh 192.168.1.1
SETTING PCQ
langkah pertama ada harus buat mangle nya di ip >firewall>mangle
lalu setting di queue langkahnya seperti dibawah ini
setting pcq hanya cocok untuk user yang banyak tapi hanya sedikit yang sering di gunakan sehingga kalau hanya beberapa pc yang hidup limitan di router akan di bagi rata dan akan menerima bandwidth besar
bandwidth management hotel
CONTOH SETTINGAN QUEUE TREE
CONTOH SETTINGAN HOTSPOT MANAGEMENT
CONTOH YOUTUBE DI KASIH BW SENDIRI
Installing Cacti on CentOS 5.5 tutorial
Installing Cacti on CentOS 5.5 tutorial
![]()
![]() In this tutorial we will be installing Cacti on CentOS 5.5 using the LCMP stack(Linux, Cherokee, MySQL and PHP).
In this tutorial we will be installing Cacti on CentOS 5.5 using the LCMP stack(Linux, Cherokee, MySQL and PHP).
What is Cacti? Cacti is a complete network, server and application graphing solution harnessing the power of RRDtool OpenSource industry standard, high performance data logging and graphing.
So before we start just some general house keeping. The base CentOS 5.5 server hostname and IP address that we’ll be using in this tutorial:
* centos01.how2centos.com (IP 10.0.0.3)
The Cacti server will eventually be available on http://cacti.how2centos.com
The assumption, for this Cacti and CentOS 5.5 tutorial, is that you are running as root and have a medium understanding of the software required or you’re Awesome.
# yum install yum-priorities
# rpm -Uhv http://apt.sw.be/redhat/el5/en/i386/rpmforge/RPMS/rpmforge-release-0.3.6-1.el5.rf.i386.rpm
# rpm -Uvh http://download.fedora.redhat.com/pub/epel/5/i386/epel-release-5-4.noarch.rpm
# rpm -Uvh http://dl.iuscommunity.org/pub/ius/stable/Redhat/5/i386/ius-release-1.0-8.ius.el5.noarch.rpm
Install Cherokee web server
# yum install cherokee rrdtool
Install PHP 5.3
# yum install php53u-pear php53u php53u-cli php53u-common php53u-devel php53u-gd php53u-mbstring php53u-mcrypt php53u-mysql php53u-pdo php53u-soap php53u-xml php53u-xmlrpc php53u-bcmath php53u-pecl-apc php53u-pecl-memcache php53u-snmp
Install MySQL and MySQL Server
# yum install mysql mysql-server
Install SNMP
# yum install net-snmp net-snmp-utils
Install Cacti
# yum install cacti
Configure snmpd, move snmpd.conf and create a new one. The ‘snmpuser’ is what you’ll use later in the Cacti interface.
# mv /etc/snmp/snmpd.conf /etc/snmp/snmpd.conf.old
# echo "rocommunity snmpuser" > /etc/snmp/snmpd.conf
Let make sure that everything is added to runlevels 2, 3, 4 and start them up.
# chkconfig mysqld on
# chkconfig snmpd on
# chkconfig cherokee on
# service mysqld start
# service snmpd start
# service cherokee start
Create ‘cacti’ MySQL database and grant privileges to ‘cactiuser’ with password ‘cactipassword’
# mysql
Welcome to the MySQL monitor. Commands end with ; or \g.
Your MySQL connection id is 14323
Server version: 5.0.77 Source distributionType ‘help;’ or ‘\h’ for help. Type ‘\c’ to clear the buffer.
mysql>create database cacti;
mysql>GRANT ALL ON cacti.* TO cactiuser@localhost IDENTIFIED BY 'cactipassword';
mysql>quit
Import the Cacti database schema
# mysql -ucactiuser -pcactipassword cacti < /var/www/cacti/cacti.sql
Configure Cacti with the details above.
# vi /var/www/cacti/include/config.php
1 | /* make sure these values refect your actual database/host/user/password */ |
Once all that has been done time to get PHP 5.3 working with Cherokee and then adding the Cacti virtual server.
Firstly lets get PHP 5.3 working with Cherokee
# cherokee-admin -b
Finally add the Cacti virtual server and browser to the URL and follow the onscreen instuctions.


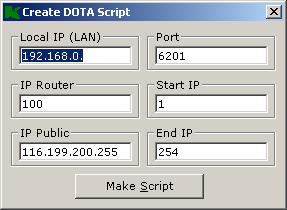
Mikrotik Script
http://www.clovanzo.com/util/create_dota_mikrotik.php
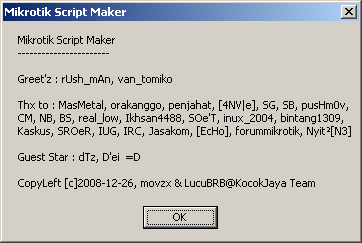
Mikrotik Script Maker
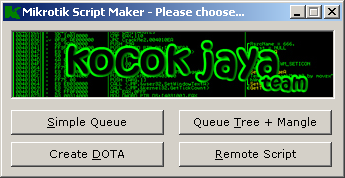
Download :
- IX
- IIX
Info :
Filename : MikrotikScriptMaker.exe
Version : 1.1.0.11
Filesize : 66.5 KB (68,096 bytes)
CRC32 : 39b3d082
MD5 : c05b4d007c495ca6cf661431b82423b9
SHA128 : 9ec6361089f19cf80d2ea830211f5f5af55dd5dc
KJTeam Partner Download
Info :
Filename : mikrotikscriptmaker.exe
Version : 1.1.0.12
Filesize : 66.5 KB (68,096 bytes)
CRC32 : 7ea7a8f6
MD5 : 8272366ae63f2bdec7e9098fada72656
SHA128 : 2914aa55f5610de4eff27b6fd34d10d50f68ff0f
Setting Zimbra di Ubuntu
Membuat Server Email di Ubuntu menggunakan ZimbraPosted on 11 October 2009 by aanxu  Pada 15 Jul 2009, di Seri Tutorial, oleh Cecep Mahbub Membuat server email di Ubuntu sekarang menjadi lebih mudah dengan adanya zimbra. Zimbra sendiri sudah memiliki fitur yang sangat lengkap, mulai dari MTA (mail transfer agent) yang dilengkapi dengan fitur anti spam dan anti virus, IMAP/POP3, webmail dan fitur kolaborasi lainnya. Di tulisan ini, kita akan belajar instalasi awal zimbra di Ubuntu. Sebelum Anda melanjutkan membaca tulisan ini, ada baiknya Anda tidak melewatkan seri tutorial DNS Server dengan Bind9 (1, 2 dan 3). Karena dalam instalasi zimbra, Anda harus memahami bagaimana cara membuat sebuah hostname bisa di resolve dengan baik dan bagaimana membuat entri mx record. Saat tulisan ini dibuat, rilis terbaru zimbra untuk versi 5, adalah 5.0.18, dan untuk versi ini zimbra hanya menyediakan installer untuk distro RHEL 4/5, Fedora 7, Debian 4, MacOS 10.4/10.5, openSUSE 10.2, SLES 10, Ubuntu 6.06/8.04 LTS. Dan untuk tutorial kali ini, kita akan menggunakan Ubuntu 8.04 (Hardy Heron). Instalasi ubuntu diasumsikan menggunakan instalasi default ubuntu 8.04 server edition. Mengkonfigurasi berkas /etc/hostsZimbra mensyaratkan hostname bisa diresolve dengan baik, sekarang coba Anda sunting berkas /etc/hosts.Dari asalnya, 127.0.0.1 localhost Menjadi 127.0.0.1 localhost Disini diasumsikan IP server adalah 192.168.56.113, dan hostnamenya adalah zimbra.perusahaan.com. Paket-paket yang dibutuhkan untuk instalasi zimbraInstal paket-paket berikut. sudo apt-get install libidn11 libpcre3 libgmp3c2 libexpat1 libstdc++6 libstdc++5 libltdl3 Untuk memudahkan, kita akan uninstall apparmor (Anda boleh tidak setuju dengan cara ini, tapi ini demi memudahkan instalasi). sudo dpkg --purge apparmor apparmor-utils Anda juga harus memastikan tidak ada yg listen di port 25, 80, 110, 143. Untuk memeriksanya, jalankan perintah berikut. Lihat port yang listen di server Anda. sudo lsof -i -n -P Contoh konfigurasi DNSHostname & Alamat IP
Kita akan buatkan alias, dibuatkan hostname yang mencerminkan fungsi dari service/layanan yang diberikan.
$TTL 7200 ; 2 hours Instalasi ZimbraPertama, ambil dulu berkas sumber dari halaman unduh zimbra. Ambil sesuai dengan arsitektur komputer Anda (32 bit atau 64 bit). Contoh, untuk versi yang saya gunakan. wget http://h.yimg.com/lo/downloads/5.0.18_GA/zcs-5.0.18_GA_3011.UBUNTU8.20090708092550.tgz Ekstrak, tar zxvf zcs-5.0.18_GA_3011.UBUNTU8.20090708092550.tgz Lalu jalankan skrip instalasi. cd zcs-5.0.18_GA_3011.UBUNTU8.20090708092550 Proses InstalasiHarusnya Anda tinggal enter-enter saja, dan menjawab beberapa pertanyaan. Tapi jika penasasaran, Anda bisa lihat urutan proses instalasinya. Mudah-mudahan bisa membuat Anda lebih paham. Operations logged to /tmp/install.log.12383 Silakan Anda tekan enter disitu. Checking for prerequisites... Lalu zimbra akan melanjutkan dengan menginstal paket-paket yang diperlukan. Removing /opt/zimbra Setelah ini akan muncul pesan seperti di bawah. Kita menggunakan hostname zimbra.perusahaan.com, dan yang kita set record mx adalah domain perusahaan.com, karena kita memang inginnya zimbra menghosting domain perusahaan.com. NS ERROR resolving MX for zimbra.perusahaan.com Disini terlihat salah satu contoh error. Ada port conflict di port 80. Saya cek dengan perintah sudo lsof -i -n -P Ternyata ada thttpd yg listen di port 80 (padahal ini untuk tutorial berikutnya hehe). Setelah service thttpd saya matikan, instalasi jalan kembali. Main menu Sekarang Anda dihadapkan dengan menu di atas. Perhatikan di bagian yang diberi tanda bintang (*******) itu ada di menu nomor tiga. Jadi Anda pilih atau ketik 3, kemudian tekan enter. Store configuration Sekarang Anda dihadapkan dengan menu berikutnya. Sama seperti tadi, perhatikan bagian yang diberi tanda bintang (**), itu ada di menu nomor 4. Jadi Anda ketik 4, lalu tekan enter. Password for admin@perusahaan.com (min 6 characters): [hINYHBUe5] Sekarang Anda diminta menuliskan password untuk user Admin. Jika Anda tekan enter, default passwordnya adalah yang ada di dalam kurung kotak. Silakan Anda ketik password yang Anda ingin set. Store configuration Sekarang semua sudah diset dengan baik. Anda tikan tekan r, Main menu Dan tunggu zimbra mengkonfigurasi sistem Anda sampai selesai. Agak lama prosesnya, jadi Anda harus sedikit bersabar. Setelah semuanya selesai, Anda bisa mengakses halaman web adminnya di https://zimbra.perusahaan.com:7071 Ingat, pakai https bukan http. Loginnya admin, password seperti yang sudah Anda set sebelumnya. Dan untuk webmail (akses untuk membaca email dari web, untuk user). http://webmail.perusahaan.com Seperti yang sudah kita set di DNS sebelumnya. |


Membuat Squide Redirek (untuk memberikan not di browser ketika error)
Untuk memindahkan suatu situs yang ingin di akses
user sedang situs tersebut termasuk yang kita blok
maka bisa kita alihkan dengan merubah file :
/etc/squid/errors/ERR_ACCESS_DENIED

cp /etc/squid/errors/ERR_ACCESS_DENIED /etc/squid/errors/ERR_ACCESS_DENIED.old

vi /etc/squid/errors/ERR_ACCESS_DENIED
(tukar isi file sebelumnya dengan seperti dibawah ini)

<html><head><script language="javascript">
window.location="http://eramuslim.com" </script>
</head><body></body></html>
Membuat Webmail Server di Centos
rpm -qa |grep postfix |
Configurasi Squide for proxy di Centos
#rpm -qa |grep squid |
Membuat Samba dengan Group Client tertentu
================================================
2.
================================================
[global]
workgroup = NAUFAL-NT
netbios name = sambalado
samba server string = Samba Naufal-PDC server
security = user
hosts allow = 192.168.1. 127.

[dunia]
path = /var/share
comment = Ini share folder Data
public = no
valid users = ahmad
read only = no
browseable = yes
force user = ahmad
force group = ahmad


#mkdir /var/share
#useradd ahmad
#chown -R ahmad.ahmad /var/share
#smbpasswd -a ahmad
password:(masukan passowrd untuk ahmad)

##smbclient //sambalado/dunia -U ahmad
Membuat Samba (konekin dari linux ke windows)
rpm -qa |grep samba |
Membuat Webserver dan Virtual Host
#rpm -qa |grep http (melihat apakah service http sudah ada/blm)
#yum install httpd  (install apache)

3 CARA MENEMPATKAN FILE DI WEB SERVER

	1. DocumentRoot/document utama biasanya/var/www/html
	2. UserDir /home/budi/html
	3. VirtualHost (bebas selain diatas misal /home/budi/web)

Konfigurasi cara 1:
   # vi /etc/httpd/conf/httpd.conf

      /DocumentRoot  (mencari letak documentRoot letak file html/php/)

      :wq
   #vi /var/www/html/index.html
      <h1><marquee behavior=alternate loop=15>wellcome in NF Computer </marquee></h1>
      :wq

   #service httpd restart atau /etc/init.d/httpd restart
 Cara panggil di browser:

 /var/www/html 	=> 	http://localhost
			http://192.168.1.23
                        http://nf.com


==========================================================================================================
cara ke 2 UserDir:

Konfigurasi :
                 #vi /etc/httpd/conf/httpd.conf

 		 /UserDir  (mencari UserDir)

			#userdir disable (dipagar #)
			userdir public_html

			<Ifmodule mod_userdir.c>
				UserDir Public_html
			</IfModule>
                   :wq
                   #useradd imi
                   #mkdir /home/imi/public_html
                   #vi /home/imi/public_html/index.html
                       <h1><marquee behavior=alternate loop=15>User Dir </marquee></h1>
                    :wq
		   #chmod 755 /home/imi/public_html
		   kemudian restart aphacenya.

                   #/etc/init.d/httpd restart

cara panggil di browser
/home/imi/public_html =>http://localhost/~imi
 			(
 User Webspace )
			http://192.168.1.23/~imi
			atau
			www.irfan.lpknf.or.id/~imi

ingat:
Kalau semua konfigurasi ok, tetapi tidak muncul coba cek firewall
#/etc/init.d/iptables stop   (untuk iptables)
#setenforce 0                 (selinux)

=============================================================================================================
VirtualHost:
konfigurasi:
#vi /etc/http/conf/httpd.conf

  :$  (pergi ke baris paling akhir)
      (kemudian tambahkan konfigurasi berikut ini)

            <VirtualHost 192.168.1.161:80 >
	    ServerAdmin admin@lpknf.or.id
	    DocumentRoot /home/irfan/html
	    ServerName  irfan.lpknf.or.id
	    ErrorLog /var/log/httpd/irfan-error_log
	   Custom /var/log/httpd/irfan-access_log common
           </VirtualHost>

	NameVirtualHost 192.168.1.161

	<VirtualHost 192.168.1.161>
        ServerAdmin
 admin@efrizal.biz
	ServerName webmail.efrizal.biz
	DocumentRoot /usr/local/html
	</VirtualHost>


note:
			    untuk virtual host lebih baik mengunakan /home
                            kalau yg tampil welcome.php dirubah saja namanya
 			    /etc/httpd/conf.d/welcome.php


Konfigurasi file /etc/httpd/conf/httpd.conf

ServerRoot "/etc/httpd"
#( direktory utama dimana file configurasi apache di letakan)

PidFile run/httpd.pid
#FILE YG DIGUNAKAN OLEH SERVER UNTUK MEREKAM NOMOR IDENTITAS PROSES (PID))

Timeout 300
#(LAMA WAKTU JEDA SEBELUM SERVER MEMBERI PESAN TIME-OUT )

KeepAlive Off
#(UNTUK MENENTUKAN APAKAH SERVER MENGIJINKAN LEBIH DARI SATU PERMINTAAN DALAM SATU KONEKSI)

MaxKeepAliveRequests 100
#JUMLAH MAXIMUM PERMINTAAN YG DIIJINKAN DALAM SATU KONEKSI/

KeepAliveTimeout 15
#JUMLAH DETIK U/ MENUNGGU PERMINTAAN BERIKUTNYA
 DARI KLIEN YG SAMA DN KONEKSI BERSAMAAN

StartServer 5
#JUMLAH SERVER YG BERJALAN SAAT DIAKTIFKAN

MaxRequestsPerChild 30
#JUMLAH PERMINTAAN MAKSIMAL U/ CHILD PROSES

port 80
#port yg digunakan oleh server

User nobody
Group nogroup
#NAMA USER DAN GROUP YG MENJALANKAN HTTPD

ServerAdmin admin@nurulfikri.com
#(MEMBERITAHU HALAMAN2 YG DIBUAT OTOMATIS OLEH SERVER SEPERTI PESAN KESALAHAN)
# ATAU ALAMAT EMAIL DARI ADMINISTRATOR.

ServerName domain.anda.com
#SETTING NAMA BISA JUGA DIGUNAKAN IP

DocumentRoot "/var/www/html"
#(LETAK FILE INDEX.HTML)

ErrorLog logs/error_log
#(LETAK FILE ERROR_LOG BIASANYA TERDAPAT PD DIREKTORY LOKAL)

LogLevel warn
#(JUMLAH PESAN KESALAHAN YG DI CATAT DLM FILE ERROR_LOG. NILAI YG DIMASUKAN
  ANTARA DEBUG, WARN,ALER,ERROR)

Melihat Modul apa yg sudah terkompilasi
#/usr/sbin/httpd -l

Melihat Modul alias
#ls
 /usr/lib/httpd/modules/ |grep alias
Membuat Webserver di Centos
#rpm -qa |grep http (melihat apakah service http sudah ada/blm) |
Perintah Perintah Dasar Linux centos
ls |
Membuat Sub DNS Server di Centos
subdomain
======
# vi nf.ok.zone
$TTL    86400
@               IN SOA  ns.nf.ok.       root (
                                        42          ; serial (d. adams)
                                        3H              ; refresh
                                        15M             ; retry
                                        1W              ; expiry
                                        1D )            ; minimum
                IN NS           ns.nf.ok.
                IN MX  10       mail.nf.ok.
www             IN A            192.168.1.62
webmail         IN A            192.168.1.62
mail            IN A            192.168.1.62
nf.ok.          IN A            192.168.1.62
ftp             IN CNAME        nf.ok.

fery.nf.ok.  IN NS		ns.fery.nf.ok.

ns.fery.nf.ok.  IN A
	192.168.1.63

###########################################
Kemudian buat juga domain fery.nf.ok
1. Tambahkan pada file  /etc/named.rfc1912.zones
zone "fery.nf.ok" IN {
        type master;
        file "fery.nf.ok.zone";
        allow-update { none; };
};

2. cd /var/named/chroot/var/named/
   cp localhost.zone fery.nf.ok.zone
   vi nf.ok.zone
$TTL    86400
@               IN SOA  ns.fery.nf.ok.       root (
                                        42          ; serial (d. adams)
                                        3H              ; refresh
                                        15M             ; retry
                                        1W              ; expiry
                                        1D )            ; minimum
                IN NS           ns.fery.nf.ok.
                IN MX  10       mail.fery.nf.ok.
www             IN A            192.168.1.62
webmail
      IN A            192.168.1.62
mail            IN A            192.168.1.62
fery.nf.ok.          IN A            192.168.1.62
ftp             IN CNAME        fery.nf.ok.


#chgrp named nf.ok.zone
#vi /etc/resolv.conf
nameserver 127.0.0.1
nameserver 192.168.1.62
#service named restart
#nslookup www.fery.nf.ok atau dig www.fery.nf.ok any atau host www.fery.nf.ok


buat kembali nama domain persis seperti langkah 1 dan 2
kemudian rubah file /etc/named.caching-nameserver.conf
yaitu merubah localhost menjadi any seperti berikut:

options {
        listen-on port 53 { any; };
        listen-on-v6 port 53 { ::1; };
        directory       "/var/named";
        dump-file       "/var/named/data/cache_dump.db";
        statistics-file "/var/named/data/named_stats.txt";
        memstatistics-file "/var/named/data/named_mem_stats.txt";

        // Those options should be
 used carefully because they disable port
        // randomization
        // query-source    port 53;
        // query-source-v6 port 53;

        allow-query     { any; };
        allow-query-cache { any; };
};
logging {
        channel default_debug {
                file "data/named.run";
                severity dynamic;
        };
};
view localhost_resolver {
        match-clients      { any; };
        match-destinations { any; };
        recursion yes;
        include "/etc/named.rfc1912.zones";
};

a==================================================================================================

subdomain dengan komputer berbeda

====================================
# vi nf.ok.zone
$TTL    86400
@               IN SOA  ns.nf.ok.       root (
                                        42          ; serial (d. adams)
                                        3H
             ; refresh
                                        15M             ; retry
                                        1W              ; expiry
                                        1D )            ; minimum
                IN NS           ns.nf.ok.
                IN MX  10       mail.nf.ok.
www             IN A            192.168.1.62
webmail         IN A            192.168.1.62
mail            IN A            192.168.1.62
nf.ok.          IN A            192.168.1.62
ftp             IN CNAME        nf.ok.

fery.nf.ok.  IN NS		ns.fery.nf.ok.
ns.fery.nf.ok.  IN A		192.168.1.16


Hidupkan komputer 192.168.1.16
buat kembali nama domain.

1. Tambahkan pada file  /etc/named.rfc1912.zones
zone "fery.nf.ok" IN {
        type master;
        file "fery.nf.ok.zone";
        allow-update { none; };
};

2. cd /var/named/chroot/var/named/
   cp localhost.zone
 fery.nf.ok.zone
   vi fery.nf.ok.zone
$TTL    86400
@               IN SOA  ns.fery.nf.ok.       root (
                                        42          ; serial (d. adams)
                                        3H              ; refresh
                                        15M             ; retry
                                        1W              ; expiry
                                        1D )            ; minimum
                IN NS           ns.fery.nf.ok.
                IN MX  10       mail.fery.nf.ok.
www             IN A            192.168.1.16
webmail         IN A            192.168.1.16
mail            IN A            192.168.1.16
fery.nf.ok.          IN A            192.168.1.16
ftp             IN CNAME        fery.nf.ok.


#chgrp named fery.nf.ok.zone
#vi /etc/resolv.conf

nameserver 192.168.1.62
#service named restart
#nslookup www.fery.nf.ok atau
 dig www.fery.nf.ok any atau host www.fery.nf.ok


kemudian rubah file /etc/named.caching-nameserver.conf
yaitu merubah localhost menjadi any seperti berikut:

options {
        listen-on port 53 { any; };
        listen-on-v6 port 53 { ::1; };
        directory       "/var/named";
        dump-file       "/var/named/data/cache_dump.db";
        statistics-file "/var/named/data/named_stats.txt";
        memstatistics-file "/var/named/data/named_mem_stats.txt";

        // Those options should be used carefully because they disable port
        // randomization
        // query-source    port 53;
        // query-source-v6 port 53;

        allow-query     { any; };
        allow-query-cache { any; };
};
logging {
        channel default_debug {
                file "data/named.run";
                severity dynamic;
        };
};
view localhost_resolver {

 match-clients      { any; };
        match-destinations { any; };
        recursion yes;
        include "/etc/named.rfc1912.zones";
};
Membuat DNS server di centos
rpm -qa |grep bind |
installasi squid pada centos 5.5
installasi squid pada centos 5.5

بسم الله الرحمن الرحيم
Squid adalah sebuah daemon yang digunakan sebagai proxy server dan web cache . Squid memiliki banyak jenis penggunaan, mulai dari mempercepat web server dengan melakukan caching permintaan yang berulang-ulang, caching DNS, caching situs web, dan caching pencarian komputer di dalam jaringan untuk sekelompok komputer yang menggunakan sumber daya jaringan yang sama, hingga pada membantu keamanan dengan cara melakukan penyaringan (filter) lalu lintas. Meskipun seringnya digunakan untuk protokol HTTP dan FTP, Squid juga menawarkan dukungan terbatas untuk beberapa protokol lainnya termasuk Transport Layer Security (TLS), Secure Socket Layer (SSL), Internet Gopher, dan HTTPS. Versi Squid 3.1 mencakup dukungan protokol IPv6 dan Internet Content Adaptation Protocol (ICAP).
tahap – tahap instalasi sebagai berikut :
$su – {you need to be a super user}
#rpm -ivh squid or #yum -y install squid {install squid}
#vi /etc/squid/squid.conf
==/etc/squid=====================================================
http_port 8080 transparent
visible_tirpeng.web.id
cache_mem 32 MB
cache_dir ufs /cache 1000 16 256
access_log /var/log/squid/access.log
#pemberian daftar acl
acl all src all
acl lan src 192.168.2.0/24
===pendaftaran ex. Untuk pembatasan besaran donwload========================
acl filegede url_regex -i \.exe
acl filegede url_regex -i \.mp3
acl filegede url_regex -i \.rar
acl filegede url_regex -i \.zip
acl filegede url_regex -i \.avi
acl filegede url_regex -i \.flv
acl filegede url_regex -i \.mp4
acl filegede url_regex -i \.wav
acl filegede url_regex -i \.7zip
acl filegede url_regex -i \.iso
acl filegede url_regex -i \.mpeg
acl filegede url_regex -i \.mpg
acl filegede url_regex -i \.vbm
acl filegede url_regex -i \.divx
#pemberian delay
delay_pools 2
delay_class 1 3
delay_parameters 1 32000/32000 8000/8000 250/250
delay_access 1 allow lan filegede
delay_access 1 deny all
delay_class 2 2
delay_parameters 2 32000/32000 8000/8000 250/250
delay_access 1 allow lan
delay_access 1 deny all
#banned domain
acl 3 url_regex -i “/etc/squid/banned.txt”
http_access deny 3
#membolehkan access untuk lan
http_access allow lan
cache_mgr tirtavium@gmail.com
=========akhir dari /etc/squid.conf==================================================
#mkdir /cache
#chmod 777 /cache
#chown squid /cache
#chgrp squid /cache
#vi /etc/squid/banned.txt {make a file that conntent you want to blocked}
example : porn
.facebook.com
adult
#squid -z
#/etc/init.d/squid start
#iptables –table nat -A PREROUTING -s 192.168.5.0/24 -p tcp -m tcp –dport 80 -j REDIRECT –to-ports 8080
HAVE FUN !!!